Illustrator Quick Tip: Opacity Masks
This quick tip lesson involves using Opacity Masks in Illustrator. Unfortunately sometimes effects that are very easy to produce in Photoshop, aren’t as easy to obtain in Illustrator. However, I try to achieve as much as I can in Illustrator so that the artwork can be used across a variety of platforms.
In this instance, we are creating a logo and want to use the opacity mask to graduate a photo from 100% opacity to transparent (white). This would be easy in Photoshop (transparent gradient) but in Illustrator we have to use an opacity mask to achieve this.
Here is our logo so far, and we simply want to add an opacity mask to the “blue” section to give it a more graduated effect. As you can see, we’ve already used a clipping mask to get our desired shape out of the background photo used.
Create a gradient layer in front of your image, as shown below.
Now you should have 2 layers, one with your image (behind the one above) and one with your “gradient” layer on top as shown. Now select the 2 as shown in your layers palette.
Just to clarify, remember that I already have a clipping mask used to define the cut out shape of the picture, and I’ve placed the gradient that I am going to use between the clipping mask and image. The actual opacity mask is applied to the IMAGE, and NOT the clipping mask (i.e. why I have the 2 layers selected as shown). IF you didn’t already know, you can select layers in the layers palette by clicking the small circle beside the layer thumbnail.
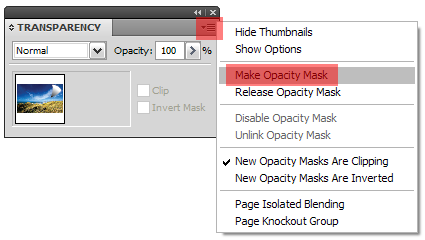
After you have both of these selected, go to your transparency palette and select “make opacity mask” from the fly out as shown below.
Now you should have the following.
That’s all there is to an opacity mask! I added some more touches to this to finalize it. For example, I made a smaller white shape inside of this, and applied another opacity mask to the solid white shape, giving the appearance of it fading from white to transparent. Here is the final product with some more effects applied.


